03 Aug 2020
Introduction
At Telstra Purple, we recently launched a new internal Office 365 tenant.
The main goal was to give employees from different acquisitions made by Telstra through the years a single roof, which would make collaboration easier.
In early June, we onboarded the first 300 users.
Unfortunately, we hit an issue that affected a high number of users, which prevented them from getting control of their new account.
In this post, we’ll go through how we designed the onboarding process, what went wrong, and how we fixed the issue.
The onboarding process
Let’s first discuss what a working onboarding process looks like.
There are two main steps an employee needs to take:
- Go through the self-service password reset (SSPR) flow to pick a password; then
- Register for SSPR and multi-factor authentication (MFA).
In our case, the impacted users faced an issue during the second phase of the account claiming process.
Before we dive into the issue, let’s expand on the strategy we put in place.
Self-service password reset
The main thing is that we don’t want to handle employees’ passwords, nor do we want to communicate it to them via email, even if it’s possible to force them to update it the first time they use it to log in.
Instead, we want users to pick a password themselves from the get-go.
To achieve this, we leverage the self-service password reset capability of Azure Active Directory.
It not only allows employees to pick a password themselves when they get onboarded, it also provides them with a way to reset their password if they forget it or get locked out of their account.
Less helpdesk involvement means it’s a win-win situation for everyone.
Our automation pre-populates authentication contact information from our HR system to ensure that only an employee can reset the password for their account:
- A mobile phone number; and
- An alternate email address.
The SSPR process then goes like this:
- A user navigates to https://aka.ms/sspr and enters the username they’ve been communicated;
- They then need to validate ownership of both the mobile number and the alternate email address associated with their account; then
- Finally, they can choose a new password.
At this stage, the user can log in with their new account.
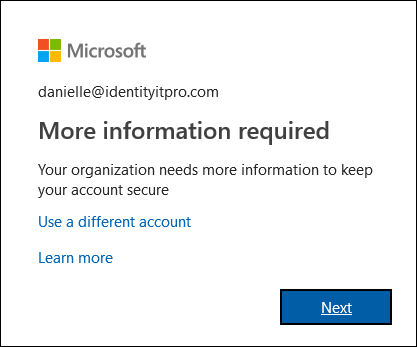
However, because our directory is configured to enforce self-service password reset and multi-factor authentication, the first time they use their new password, they will be presented with a sign-in interruption indicating they need to perform additional steps.
 Source: https://docs.microsoft.com/en-us/azure/active-directory/user-help/multi-factor-authentication-end-user-first-time#open-the-additional-security-verification-page
SSPR and MFA registration
But wait! If they reset their password already, why do they need to register for SSPR?
I know, right?
While the automation seeded information against their account to allow them to initially reset their password, Azure Active Directory still needs them to manually register information for self-service password reset.
It’s now time for our employees to register for self-service password reset and multi-factor authentication.
The goal here is for users to provide information that will allow them to both reset their password themselves, as well as be able to complete MFA challenges when they sign in.
Because the information users would provide in those two steps are the same, we take advantage of the combined registration for SSPR and MFA in AAD.
The benefits of using this approach are two-fold.
First, it means users only need to provide security information once.
It also reduces confusion, as otherwise they would get two separate sign-in interruptions — one for SSPR registration, and another one for MFA registration — and could think that the first registration didn’t work properly.
The issue
During the SSPR and MFA registration, users are required to provide and verify both a mobile number and an alternate email address.
At this stage, some employees would face this issue:
- They provided their mobile phone number;
- They received a code via text; then
- When keying the code in, the verification wouldn’t work.
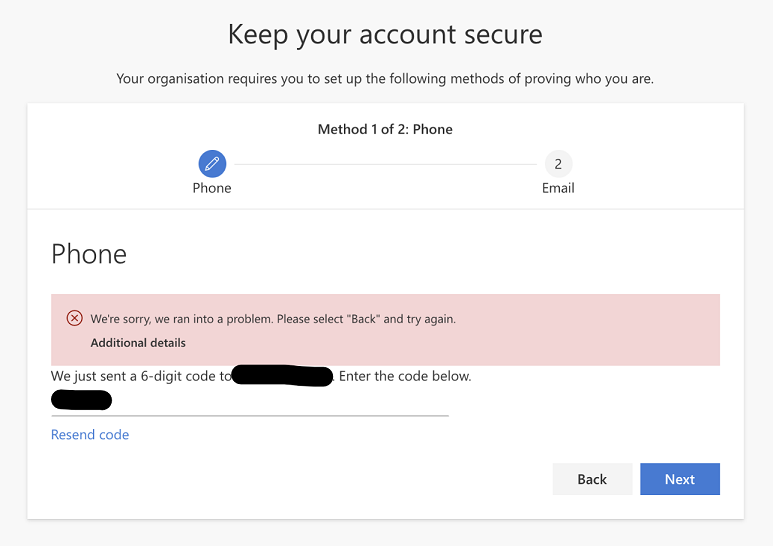 The error some users faced when attempting to verify their mobile phone number.
Let’s now discuss how we investigated and fixed this issue.
The investigation
We launched the new tenant during lockdown, while many organisations were moving to the cloud to support remote work.
There was also an open service advisory impacting some systems.
Associated with the fact that some users could still complete the whole process without any trouble, we thought it was a transient issue, and decided to wait for the next morning.
Unfortunately, the error persisted the next day, and we opened a support case with Microsoft.
While waiting for a response, we analysed the AAD audit logs, and found something interesting:
- Users who could complete the SSPR and MFA registration never encountered this issue; and
- No user who experienced this issue successfully completed the process on subsequent attempts.
This clear dichotomy, linked with the fact that time itself didn’t fix anything, reinforced the idea that this wasn’t a transient issue.
The cause
Upon further investigation, we finally found the common denominator between all the users who couldn’t complete the process: in AAD, their mail attribute was empty!
For other users, it would be filled with the primary SMTP address of their Exchange mailbox.
It was great to have a potential lead, but what could we do about it?
My high-level understanding is that the mail attribute in AAD is read-only, and is internally set by Exchange when a mailbox is created for a user.
So how could we get it updated?
My colleague Rob McLeod had a great idea: why don’t we add an alias to their mailbox, and hope this will trigger Exchange to write that attribute back to AAD?
We first tested that theory manually through the Exchange admin center on a small number of users, and a few minutes later we gladly found out that the mail attribute for these users was populated.
We then asked these users to go through the SSPR and MFA registration process again, and it worked 🎉!
How we fixed it
Because we didn’t want to manually add a secondary email address to the mailbox of each impacted user, we decided to write a PowerShell script to take care of this, which looked something like this:
Connect-AzureAD
Connect-ExchangeOnline

$aadStaffGroupName = '<name-of-group-containing-all-staff>'
$aadStaffGroup = Get-AzureADGroup -SearchString $aadStaffGroupName

#
# We use -All:$true because AAD only returns the first 100 members by default
# We also know that this group doesn't contain nested groups, so we don't need to cater for that
#
$staffWithoutMailAttribute = Get-AzureADGroupMember -ObjectId $aadStaffGroup.ObjectId -All:$true | Where-Object { [string]::IsNullOrEmpty($_.Mail) }

foreach ($userWithoutMailAttribute in $staffWithoutMailAttribute) {

    #
    # Like in many organisations, the username and email address are the same
    #
    $userMailbox = Get-Mailbox -Identity $userWithoutMailAttribute.UserPrincipalName

    #
    # 'smtp' means secondary email address, while 'SMTP' means primary email address
    # See https://docs.microsoft.com/en-us/powershell/module/exchange/set-mailbox
    #
    $secondaryEmailAddress = 'smtp:{0}[email protected]' -f $userMailbox.Alias
    Set-Mailbox -Identity $userWithoutMailAttribute.UserPrincipalName -EmailAddresses @{ Add = $secondaryEmailAddress }
}

#
# Periodically query AAD until all users have the `mail` attribute filled out
#
$numberOfUsersWithoutMailAttribute = $staffWithoutMailAttribute | Measure-Object | Select-Object -ExpandProperty Count
while ($numberOfUsersWithoutMailAttribute -gt 0) {
    Start-Sleep -Seconds 60

    $staffWithoutMailAttribute = Get-AzureADGroupMember -ObjectId $aadStaffGroup.ObjectId -All:$true | Where-Object { [string]::IsNullOrEmpty($_.Mail) }
    $numberOfUsersWithoutMailAttribute = $staffWithoutMailAttribute | Measure-Object | Select-Object -ExpandProperty Count
}
When affected users then reported back they could then complete the process, we wrote a similar script to remove the temporary secondary email address added in the above script.
Why this happened in the first place
When Microsoft responded to our support request, we shared our findings with them, but we never found out why the mail attribute hadn’t initially been populated for these users.
All the employees have been assigned licenses around the same time and through automation, so there’s nothing on our end that we did differently for some of them.
If you’re reading this and you have an idea, I’d love for you to reach out to me on Twitter.
Conclusion
In this post, we first described what the onboarding process in our new tenant is.
We then discussed the issue that some users faced when going through the SSPR and MFA registration, along with the steps of our investigation to find our what the cause was.
Next was the manual process to validate and fix the issue.
Finally, we saw how we automated fixing this issue, to allow the impacted users to get control of their new account.
Thank you to my colleague Raphael Haddad for reviewing this post before publishing.
Cheers for making it all the way down here 🙇♂️.
17 Jul 2020
Introduction
We’re trying to improve the security posture of our internal applications.
One aspect of this is how we deal with sensitive information, like database connection strings, API keys, or AAD client secrets.
The approach we’re using is to store these in Key Vault instances, which can be accessed by the applications that require them, thanks to Azure managed identities.
In the case of Azure SQL, however, we’re using a slighty different technique, by leveraging Azure Active Directory authentication, and more specifically token-based authentication.
Instead of using a connection string that contains a username and a password, we’re using the following strategy:
- If not done already, assign a managed identity to the application in Azure;
- Grant the necessary permissions to this identity on the target Azure SQL database;
- Acquire a token from Azure Active Directory, and use it to establish the connection to the database.
The main benefit comes from the fact that we don’t need to manage and protect the credentials required to connect to the database.
We think this is more secure, because the less sensitive information to protect, the less chance of them being accessed by unauthorised parties.
After all, isn’t the best password one that doesn’t exist in the first place?
In this post, we’ll talk about how one can connect to Azure SQL using token-based Azure Active Directory authentication, and how to do so using Entity Framework Core.
Connecting to Azure SQL using Azure Active Directory authentication
As mentioned before, this approach doesn’t use the traditional way of having a connection string that contains a username and a password.
Instead, the credentials are replaced with an access token, much like you would use when you call an API.
Here’s a simple example:
public static async Task Main(string[] args)
{
    var connectionStringBuilder = new SqlConnectionStringBuilder
    {
        DataSource = "tcp:<azure-sql-instance-name>.database.windows.net,1433",
        InitialCatalog = "<azure-sql-database-name>",
        TrustServerCertificate = false,
        Encrypt = true
    };

    await using var sqlConnection = new SqlConnection(connectionStringBuilder.ConnectionString)
    {
        AccessToken = await GetAzureSqlAccessToken()
    };

    await sqlConnection.OpenAsync();
    var currentTime = await sqlConnection.ExecuteScalarAsync<DateTime>("SELECT GETDATE()");

    Console.WriteLine($"The time is now {currentTime.ToShortTimeString()}");
}

private static async Task<string> GetAzureSqlAccessToken()
{
    // See https://docs.microsoft.com/en-us/azure/active-directory/managed-identities-azure-resources/services-support-managed-identities#azure-sql
    var tokenRequestContext = new TokenRequestContext(new[] { "https://database.windows.net//.default" });
    var tokenRequestResult = await new DefaultAzureCredential().GetTokenAsync(tokenRequestContext);

    return tokenRequestResult.Token;
}
As previously mentioned, the connection string doesn’t contain a username or a password, only the Azure SQL instance and database we want to connect to.
The authentication is performed via an access token that we associate with the SQL connection.
Acquiring the token is done with the help of the Azure.Identity NuGet package through the DefaultAzureCredential class.
The killer feature of that class is, that it tries to acquire an access token from different sources, including:
- Using credentials exposed through environment variables;
- Using credentials of an Azure managed identity;
- Using the account that is logged in to Visual Studio;
- Using the account that is logged in to the Visual Studio Code Azure Account extension.
For more information, check out the Azure SDK for .NET GitHub repository.
Integrating AAD authentication with Entity Framework Core
Many of our internal applications use Entity Framework Core to access data.
One impact is that the example shown above isn’t viable anymore, because EF Core manages the lifetime of SQL connections, meaning it creates and disposes of connections internally.
While this is a big advantage, it means we need to find a way to “inject” an access token in the SQL connection before EF Core tries to use it.
The good news is that EF Core 3.0 introduced the concept of interceptors, which had been present in EF 6 for a long time.
Interestingly, I could only find a mention of this capability in the release notes of EF Core 3.0, but not in the EF Core docs.
The AddInterceptors method used in the example expects instances of IInterceptor, which is a marker interface, making it hard to discover types that implement it.
Using the decompiler of your choice — ILSpy in my case — we can easily find them:
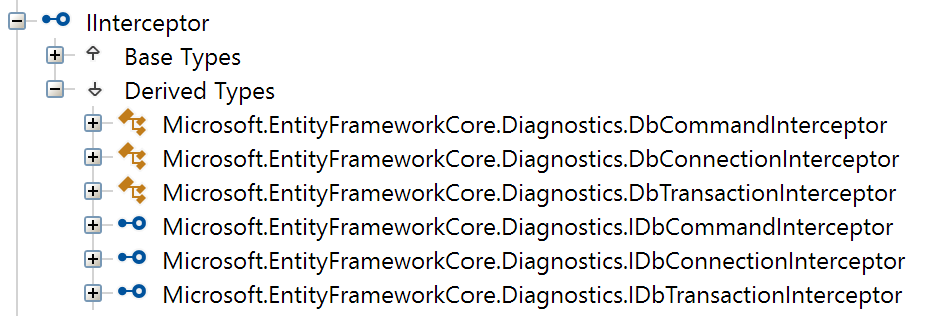
The DbConnectionInterceptor type seems like a fit.
Luckily, it exposes a ConnectionOpeningAsync method which sounds just like what we need!
⚠ Update
If you use synchronous methods over your DbContext instance, like ToList(), Count(), or Any(), you need to override the synchronous ConnectionOpening method of the interceptor.
See more details in this new post!
Let’s get to it, shall we?
public class Startup
{
    public Startup(IConfiguration configuration)
    {
        Configuration = configuration;
    }

    public IConfiguration Configuration { get; }

    public void ConfigureServices(IServiceCollection services)
    {
        services.AddDbContext<AppDbContext>(options =>
        {
            options.UseSqlServer(Configuration.GetConnectionString("<connection-string-name>"));
            options.AddInterceptors(new AadAuthenticationDbConnectionInterceptor());
        });
    }
}

public class AadAuthenticationDbConnectionInterceptor : DbConnectionInterceptor
{
    public override async Task<InterceptionResult> ConnectionOpeningAsync(
        DbConnection connection,
        ConnectionEventData eventData,
        InterceptionResult result,
        CancellationToken cancellationToken)
    {
        var sqlConnection = (SqlConnection)connection;

        //
        // Only try to get a token from AAD if
        //  - We connect to an Azure SQL instance; and
        //  - The connection doesn't specify a username.
        //
        var connectionStringBuilder = new SqlConnectionStringBuilder(sqlConnection.ConnectionString);
        if (connectionStringBuilder.DataSource.Contains("database.windows.net", StringComparison.OrdinalIgnoreCase) && string.IsNullOrEmpty(connectionStringBuilder.UserID))
        {
            sqlConnection.AccessToken = await GetAzureSqlAccessToken(cancellationToken);
        }

        return await base.ConnectionOpeningAsync(connection, eventData, result, cancellationToken);
    }

    private static async Task<string> GetAzureSqlAccessToken(CancellationToken cancellationToken)
    {
        // See https://docs.microsoft.com/en-us/azure/active-directory/managed-identities-azure-resources/services-support-managed-identities#azure-sql
        var tokenRequestContext = new TokenRequestContext(new[] { "https://database.windows.net//.default" });
        var tokenRequestResult = await new DefaultAzureCredential().GetTokenAsync(tokenRequestContext, cancellationToken);

        return tokenRequestResult.Token;
    }
}
The configuration of the EF Core DbContext is ordinary, with the exception of the registration of our interceptor.
The interceptor itself is straightforward as well; we can see that the way we acquire a token is similar to the previous example.
One interesting aspect is that we try to detect whether we even need to get an access token, based on the SQL Server instance we connect to, and whether the connection string specifies a username.
During local development, there’s a high chance developers will connect to a local SQL database, so we don’t need a token in this case.
Imagine also that for some reason, we revert back to using a connection string that contains a username and password; in that case as well, getting a token is not needed.
Going further: resolving interceptors with Dependency Injection
⚠ Update
Good news!
There’s a much simpler and terser solution to resolve interceptors from the dependency injection container — please check out this new post.
I strongly recommend that you not use the solution described below, as it involves much more code and hasn’t been fully tested.
Interceptors are a great feature, but at the time of writing, the public API only allows you to add already constructed instances, which can be limiting.
What if our interceptor needs to take dependencies on other services?
Registering the interceptors in the application service provider doesn’t work, because EF Core maintains an internal service provider, which is used to resolve interceptors.
I found a way by reverse engineering how EF Core itself is built.
However, as you’ll see, the solution is quite involved, and I haven’t fully tested it.
As a result, please carefully test it before using this method.
When configuring the DbContext, we can register an extension which has access to the internal service provider; hence, we can use it to register additional services, in this case our interceptor.
However, this internal provider doesn’t have as many registered services as a provider used in an ASP.NET Core application.
For example, this provider doesn’t have the commonly used ILogger<T> service registered.
Our goal is then to register our interceptor in the internal provider, but somehow have it be resolved from the application provider, so we can take advantage of all the services registered in the latter.
To achieve this, we can leverage an extension provided by EF Core, called CoreOptionsExtension, which has a reference to the application service provider — the one we use to register services in the ConfigureServices method of the Startup class of ASP.NET Core applications.
The following implementation is based on the internal CoreOptionsExtension used in EF Core.
public class Startup
{
    public Startup(IConfiguration configuration)
    {
        Configuration = configuration;
    }

    public IConfiguration Configuration { get; }

    public void ConfigureServices(IServiceCollection services)
    {
        // 1. Register our interceptor as "itself"
        services.AddScoped<AadAuthenticationDbConnectionInterceptor>();

        // 2. Add our extension to EF Core
        services.AddDbContext<AppDbContext>(options =>
        {
            options.UseSqlServer(Configuration.GetConnectionString("<connection-string-name"));
            ((IDbContextOptionsBuilderInfrastructure)options).AddOrUpdateExtension(new AppOptionsExtension());
        });
    }
}

public class AppOptionsExtension : IDbContextOptionsExtension
{
    private DbContextOptionsExtensionInfo _info;

    public DbContextOptionsExtensionInfo Info => _info ??= new ExtensionInfo(this);

    public void ApplyServices(IServiceCollection services)
    {
        // 3. Get application service provider from CoreOptionsExtension, and
        // resolve interceptor registered in step 1, so we can register it in the
        // internal service provider as IInterceptor
        services.AddScoped<IInterceptor>(provider =>
        {
            var applicationServiceProvider = provider
                .GetRequiredService<IDbContextOptions>()
                .FindExtension<CoreOptionsExtension>()
                .ApplicationServiceProvider;

            return applicationServiceProvider.GetRequiredService<AadAuthenticationDbConnectionInterceptor>();
        });
    }

    public void Validate(IDbContextOptions options)
    {
    }

    private class ExtensionInfo : DbContextOptionsExtensionInfo
    {
        public ExtensionInfo(IDbContextOptionsExtension extension) : base(extension)
        {
        }

        public override bool IsDatabaseProvider => false;
        public override string LogFragment => null;
        public override long GetServiceProviderHashCode() => 0L;
        public override void PopulateDebugInfo(IDictionary<string, string> debugInfo)
        {
        }
    }
}

public class AadAuthenticationDbConnectionInterceptor : DbConnectionInterceptor
{
    private readonly ILogger _logger;

    // In this case we inject an instance of ILogger<T>, but you could inject any service
    // that is registered in your application provider
    public AadAuthenticationDbConnectionInterceptor(ILogger<AadAuthenticationDbConnectionInterceptor> logger)
    {
        _logger = logger;
    }

    public override async Task<InterceptionResult> ConnectionOpeningAsync(
        DbConnection connection,
        ConnectionEventData eventData,
        InterceptionResult result,
        CancellationToken cancellationToken)
    {
        var sqlConnection = (SqlConnection)connection;

        //
        // Only try to get a token from AAD if
        //  - We connect to an Azure SQL instance; and
        //  - The connection doesn't specify a username.
        //
        var connectionStringBuilder = new SqlConnectionStringBuilder(sqlConnection.ConnectionString);
        if (connectionStringBuilder.DataSource.Contains("database.windows.net", StringComparison.OrdinalIgnoreCase) && string.IsNullOrEmpty(connectionStringBuilder.UserID))
        {
            try
            {
                sqlConnection.AccessToken = await GetAzureSqlAccessToken(cancellationToken);
                _logger.LogInformation("Successfully acquired a token to connect to Azure SQL");
            }
            catch (Exception e)
            {
                _logger.LogError(e, "Unable to acquire a token to connect to Azure SQL");
            }
        }
        else
        {
            _logger.LogInformation("No need to get a token");
        }

        return await base.ConnectionOpeningAsync(connection, eventData, result, cancellationToken);
    }

    private static async Task<string> GetAzureSqlAccessToken(CancellationToken cancellationToken)
    {
        if (RandomNumberGenerator.GetInt32(10) >= 5)
        {
            throw new Exception("Faking an exception while tying to get a token");
        }

        // See https://docs.microsoft.com/en-us/azure/active-directory/managed-identities-azure-resources/services-support-managed-identities#azure-sql
        var tokenRequestContext = new TokenRequestContext(new[] { "https://database.windows.net//.default" });
        var tokenRequestResult = await new DefaultAzureCredential().GetTokenAsync(tokenRequestContext, cancellationToken);

        return tokenRequestResult.Token;
    }
}
Conclusion
In this post, we covered how we can use Azure Active Directory authentication to connect to Azure SQL, focusing on the token-based aspect of it, since we’re trying to reduce the amount of sensitive information an application needs to deal with.
We also went over a nice way to integrate AAD authentication with Entity Framework Core, by leveraging interceptors.
The first benefit of using this approach is that we let EF Core manage SQL connections internally.
The second advantage of using interceptors is that they are asynchronous, which allows us not to have to resort to block on asynchronous operations.
Finally, we investigated how we can inject services in our interceptors.
The solution we explored involves quite a bit of ceremony, which makes it pretty heavy.
I opened an issue on the EF Core repository, we’ll see if the team finds a way to make this more friendly.
Please let me know on Twitter if you know of an easier way to achieve this.
I hope you liked this post!
11 Jul 2020
This post has initially been published on the Telstra Purple blog at https://purple.telstra.com/blog/how-we-sped-up-an-aspnet-core-endpoint-from-20-seconds-down-to-4-seconds.
Introduction
We have an internal application at work that sends large payloads to the browser, approximately 25MB.
We know it is a problem and it is on our radar to do something about it.
In this article, we’ll go through the investigation we performed, and how we ultimately brought the response time of this specific endpoint from 20+ seconds down to 4 seconds.
The problem we faced
We run this application on an Azure App Service, and the offending endpoint had always been slow, and I personally assumed that it was due to the amount of data it was returning, until one day for testing purposes, I ran the app locally and noticed that it was much faster, between 6 and 7 seconds.
To make sure we were not comparing apples to oranges, we made sure that the conditions were as similar as they can be:
- We were running the same version of the app — that is, the same Git commit, we didn’t go as far as running the exact same binaries;
- The apps were connecting to the same Azure SQL databases; and
- They were also using the same instance of Azure Cache for Redis.
The one big difference that we could see was that our dev laptops are much more powerful in regards to the CPU, the amount of RAM or the speed of the storage.
The investigation
What could explain that this endpoint took roughly 3 times less to execute when it was connecting to the same resources?
To be perfectly honest, I can’t remember exactly what pointed me in this direction, but at some point I realised two things:
- Starting with ASP.NET Core 3.0, synchronous I/O is disabled by default, meaning an exception will be thrown, if you try to read the request body or write to the response body in a synchronous, blocking way; see the official docs for more details on that; and
- Newtonsoft.Json, also known as JSON.NET, is synchronous. The app used it as the new System.Text.Json stack didn’t exist when it was migrated from ASP.NET Classic to ASP.NET Core.
How then did the framework manage to use a synchronous formatter while the default behaviour is to disable synchronous I/O, all without throwing exceptions?
I love reading code, it was then a great excuse for me to go and have a look at the implementation.
Following the function calls from AddNewtonsoftJson, we end up in the NewtonsoftJsonMvcOptionsSetup where we can see how we replace the System.Text.Json-based formatter for the one based on Newtonsoft.Json.
That specific formatter reveals it’s performing some Stream gymnastics — see the code on GitHub.
Instead of writing directly to the response body, the JSON.NET serializer writes (synchronously) to an intermediate FileBufferingWriteStream one, which is then used to write (asynchronously this time) to the response body.
The XML docs of FileBufferingWriteStream explain it perfectly:
A Stream that buffers content to be written to disk.
Use DrainBufferAsync(Stream, CancellationToken) to write buffered content to a target Stream.
That Stream implementation will hold the data in memory while it’s smaller than 32kB; any larger than that and it stores it in a temporary file.
If my investigation was correct, the response body would’ve been written in blocks of 16kB.
A quick math operation would show: 25MB written in 16kB blocks = 1,600 operations, 1,598 of which involve the file system. Eek!
This could explain why the endpoint was executing so much quicker on my dev laptop than on the live App Service; while my laptop has an SSD with near-immediate access times and super quick read/write operations, our current App Service Plan still runs with spinning disks!
How can we verify whether our hypothesis is correct?
Solution #1, quick and dirty
The easiest way I could think of to get the file system out of the equation was to enable synchronous I/O.
// Startup.cs
public void ConfigureServices(IServiceCollection services)
{
    services
        .AddControllers(options =>
        {
            // Suppress buffering through the file system
            options.SuppressOutputFormatterBuffering = true;
        })
        .AddNewtonsoftJson();
}

// Controller.cs
public Task<IActionResult> Action()
{
    // From https://docs.microsoft.com/en-us/dotnet/core/compatibility/aspnetcore#http-synchronous-io-disabled-in-all-servers
    // Allow synchronous I/O on a per-endpoint basis
    var syncIOFeature = HttpContext.Features.Get<IHttpBodyControlFeature>();
    if (syncIOFeature != null)
    {
        syncIOFeature.AllowSynchronousIO = true;
    }

    // Rest of the implementation, ommited for brevity
}
Making both of those changes is required because:
- Only suppressing output buffering would throw an exception, since we’d be synchronously writing to the response body, while it’s disabled by default;
- Only allow synchronous I/O wouldn’t change anything, as output buffering is enabled by default, so that updating projects to ASP.NET Core 3.0 doesn’t break when using Newtonsoft.Json and sending responses larger than 32kB.
Locally, I observed a response time of ~4 seconds, which was a substantial improvement of ~30%.
While it was a good sign that our hypothesis was correct, we didn’t want to ship this version.
Our application doesn’t get that much traffic, but synchronous I/O should be avoided if possible, as it is a blocking operation that can lead to thread starvation.
Solution #2, more involved, and more sustainable
The second option was to remove the dependency on Newtonsoft.Json, and use the new System.Text.Json serialiser.
The latter is async friendly, meaning it can write directly to the response stream, without an intermediary buffer.
It wasn’t as easy as swapping serialisers, as at the time of writing System.Text.Json it was not at feature parity with Newtonsoft.Json.
My opinion is that it’s totally understandable as JSON.NET has been available far longer.
Microsoft provides a good and honest comparison between the two frameworks: https://docs.microsoft.com/en-us/dotnet/standard/serialization/system-text-json-migrate-from-newtonsoft-how-to
The main thing for us was that System.Text.Json doesn’t support ignoring properties with default values. For example: like 0 for integers.
We couldn’t just ignore this, because the payload is already so large, adding unnecessary properties to it would have made it even larger.
Luckily, the workaround was relatively straightforward and well documented: we needed to write a custom converter, which gave us total control over which properties were serialised.
It was boring, plumbing code to write, but it was easy.
In the end, we removed the changes mentioned above, and plugged in System.Text.Json.
// Startup.cs
public void ConfigureServices(IServiceCollection services)
{
    services
        .AddControllers()
        .AddJsonOptions(options =>
        {
            // Converters for types we own
            options.JsonSerializerOptions.Converters.Add(new FirstCustomConverter());
            options.JsonSerializerOptions.Converters.Add(new SecondCustomConverter());

            // Make sure that enums are serialised as strings by default
            options.JsonSerializerOptions.Converters.Add(new JsonStringEnumConverter());

            // Ignore `null` values by default to reduce the payload size
            options.JsonSerializerOptions.IgnoreNullValues = true;
        });
}
We gave it another go, and again achieved a consistent 4-second response time on that endpoint 🎉.
After deploying this new version to our App Service, we were stoked to see a similar response time there as well.

Conclusion
This was a super fun investigation, and I was once again super happy to dig into the ASP.NET Core internals and learn a bit more about how some of it works.
While I realise our case was extreme given the size of the response payload, in the future I’ll think twice when I encounter a code base using Newtonsoft.Json, and see how hard it’d be to move to System.Text.Json.
There’s definitely a big gap between both, but the team is hard at work to fill some of it for .NET 5.
See the .NET 5 preview 4 announcement and search for the “Improving migration from Newtonsoft.Json to System.Text.Json” header to learn more about where the effort goes.
You can also check issues with the “area-System.Text.Json” on the dotnet/runtime repository, or take a look at the specific project board for System.Text.Json if you want to be even closer from what’s happening.
06 Nov 2019
Introduction
I recently had to build a super simple application that had two main parts:
- the home page was accessible to anonymous users and presented them with a basic form;
- an “admin” section that required users to be authenticated, and where they could approve or reject submissions done via the home page.
Super simple, but I faced an issue related to antiforgery that I couldn’t understand at the time.
I went with a workaround but thought I’d dig a bit deeper when I have time.
Let’s have a look at it together!
How it was set up
Authentication
We’ll first go through how authentication was wired.
Because only a subset of pages needed the user to be authenticated, I thought I’d configure the app so that authentication runs only for requests that need it.
What this means in practice is not setting the DefaultAuthenticateScheme on AuthenticationOptions, and be explicit about the authentication scheme in the authorisation policy. Doing it this way has the advantage of doing authentication “just in time”, only for requests that need it.
// Startup.cs
public void ConfigureServices(IServiceCollection services)
{
    services
        .AddAuthentication()
        .AddCookie("Cookie");

    services
        .AddAuthorization(options =>
        {
            options.AddPolicy("LoggedInWithCookie", builder => builder
                .AddAuthenticationSchemes("Cookie")
                .RequireAuthenticatedUser());
        });
}

// HomeController.cs
// No authentication required here
public class HomeController : Controller
{
    [HttpGet("")]
    public IActionResult Index() => View();
}

// AdminController.cs
// All requests must be authenticated
[Route("admin")]
[Authorize(Policy = "LoggedInWithCookie")]
public class AdminController : Controller
{
    [HttpGet("")]
    public IActionResult Index() => View();
}
Antiforgery
The other part that we’re interested in is antiforgery.
If you don’t know what that is, it’s the mechanism that protects ASP.NET Core from cross-site request forgery (XSRF).
You can read more about it on the great official docs.
My recommendation, instead of opting in antiforgery on a per-endpoint basis, is to take advantage of the AutoValidateAntiforgeryTokenAttribute filter, which “lights up” the check for all requests except GET, HEAD, TRACE and OPTIONS ones.
Should you want to not enable antiforgery on a specific endpoint, you can apply the [IgnoreAntiforgeryToken] attribute as an opt-out mechanism — it’s the authentication equivalent of [AllowAnonymous].
I chose to apply antiforgery globally like so:
// Startup.cs
public void ConfigureServices(IServiceCollection services)
{
    [...]

    services.AddMvc(options =>
    {
        options.Filters.Add<AutoValidateAntiforgeryTokenAttribute>();
    });
}
The issue
The antiforgery mechanism worked well for the home page, in that trying to send POST requests from Postman didn’t work and returned an expected 400 HTTP response.
However, the approval/rejection requests in the admin section didn’t work and fetched the following error message:
Microsoft.AspNetCore.Antiforgery.AntiforgeryValidationException: The provided antiforgery token was meant for a different claims-based user than the current user.
The diagnosis
After doing some tests, I came to the conclusion that it was failing because when the antiforgery check was made, authentication had not run yet, so the request was treated as if it was anonymous, and that didn’t match the hidden field POSTed in the HTML form, nor the antiforgery cookie value.
This was surprising to me as the documentation for the AutoValidateAntiforgeryTokenAttribute class mentions that the Order property is explicitly set to 1000 so that it runs after authentication.
To validate my suspicions, I changed the minimum logging level on the app to Debug, ran the request again, and this came up (slightly updated to avoid super long lines):
Execution plan of authorization filters (in the following order):
 - Microsoft.AspNetCore.Mvc.ViewFeatures.Internal.AutoValidateAntiforgeryTokenAuthorizationFilter
 - Microsoft.AspNetCore.Mvc.Authorization.AuthorizeFilter
This confirmed what my hunch was.
Now we need to figure out why this is the case.
The solution
It was 100% random that I tried a different way of adding the antiforgery filter to the MVC global filters collection.
But it worked 🤔.
// Startup.cs
public void ConfigureServices(IServiceCollection services)
{
    [...]

    services.AddMvc(options =>
    {
        // What it was before
        // options.Filters.Add<AutoValidateAntiforgeryTokenAttribute>();

        // What I tried for no logical reason
        options.Filter.Add(new AutoValidateAntiforgeryTokenAttribute());
    });
}
Why did it work?
The fact that ASP.NET Core is open-source makes these types of researchs really easy.
So I compared both overloads of the Add method of the FilterCollection class.
It turns out that the generic overload Add<T>() calls another generic overload with an extra parameter order with a value of 0 which, ultimately, creates an instance of TypeFilterAttribute which “wraps” the original filter type, ignoring its order.
Running the app again after making those changes confirmed that using this overload was respecting the Order set on AutoValidateAntiforgeryTokenAttribute, as I could see the following in the logs (again slightly modified):
Execution plan of authorization filters (in the following order):
 - Microsoft.AspNetCore.Mvc.Authorization.AuthorizeFilter
 - Microsoft.AspNetCore.Mvc.ViewFeatures.Internal.AutoValidateAntiforgeryTokenAuthorizationFilter
Conclusion
Working with an open-source framework makes it easier to figure out why it’s sometimes not behaving as you expect it to.
In the future, I’ll refrain from using the generic overload, instead I’ll instantiate the filter myself to avoid surprises like that one.
I hope you liked that post 👍
23 Jun 2019
Introduction
When extracting an identity from a JSON Web Token (JWT), ASP.NET Core — and .NET in general — maps some claims. In other words, the claims in the instance of ClaimsIdentity do not match perfectly the ones found in the JWT payload.
In this post we’ll go through an example of that behaviour, discover where that comes from, and how to opt out.
An example
If you use OpenID Connect- or OAuth2-based authentication in your application, there’s a high chance this is happening, potentially without you knowing, because it’s the default behaviour.
Let’s imagine we have an ASP.NET Core application using OpenID Connect to authenticate its users against an OIDC identity provider.
public void ConfigureServices(IServiceCollection services)
{
    services
        .AddAuthentication(options =>
        {
            options.DefaultScheme = "Cookies";
            options.DefaultChallengeScheme = "OpenIDConnect";
        })
        .AddOpenIdConnect("OpenIDConnect", options =>
        {
            options.Authority = "<the-url-to-the-identity-provider>";
            options.ClientId = "<the-client-id>";
        })
        .AddCookie("Cookies");
}
Here’s what the payload part of the issues JWT could look like:
{
  "aud": "<audience>",
  "iss": "<issuer-of-the-jwt>",
  "iat": 1561237872,
  "nbf": 1561237872,
  "exp": 1561241772,
  "email": "<email-address>",
  "name": "Someone Cool",
  "nonce": "636968349704644732.MjU2MzhiNzMtNDYwNi00NjZjLTkxZDItYjY3YTJkZDMzMzk0ODMyYzQxYzItNmRmNi00NmFiLThiMzItN2QxYjZkNzg5YjE4",
  "oid": "84a52e7b-d379-410d-bc6a-636c3d11d7b2",
  "preferred_username": "Someone Cool",
  "sub": "<some-opaque-identifier>",
  "tid": "<tenant-id>",
  "uti": "bGsQjxNN_UWE-Z2h-wEAAA",
  "ver": "2.0"
}
Now, here’s what the JSON representation of the claims in the extracted ClaimsIdentity would be:
{
  "aud": "<audience>",
  "iss": "<issuer-of-the-jwt>",
  "iat": 1561238329,
  "nbf": 1561238329,
  "exp": 1561242229,
  "http://schemas.xmlsoap.org/ws/2005/05/identity/claims/emailaddress": "<email-address>",
  "name": "Someone Cool",
  "nonce": "636968354285381824.ZmE2M2Y2NWItZjc5NS00NTc3LWE5ZWItMGQxMjI2MjYwNjgyODI3Yjg1NTItYWMzYS00MDE3LThkMjctZjBkZDRkZmExOWI1",
  "http://schemas.microsoft.com/identity/claims/objectidentifier": "84a52e7b-d379-410d-bc6a-636c3d11d7b2",
  "preferred_username": "Someone Cool",
  "http://schemas.xmlsoap.org/ws/2005/05/identity/claims/nameidentifier": "<some-opaque-identifier>",
  "http://schemas.microsoft.com/identity/claims/tenantid": "<tenant-id>",
  "uti": "rzybpqYLHEi4Wyk-yv0AAA",
  "ver": "2.0"
}
While some claims are identical, some of them got their name changed — let’s list them:
| Claim name in JWT |
Claim name in ClaimsIdentity |
email |
http://schemas.xmlsoap.org/ws/2005/05/identity/claims/emailaddress |
oid |
http://schemas.microsoft.com/identity/claims/objectidentifier |
sub |
http://schemas.xmlsoap.org/ws/2005/05/identity/claims/nameidentifier |
tid |
http://schemas.microsoft.com/identity/claims/tenantid |
Let’s have a look at where that behaviour comes from.
How does that happen?
The answer to that question lies in the library that is used to handle JSON Web Tokens — the validation and the extraction of an identity. This is the System.IdentityModel.Tokens.Jwt NuGet package, which source code is also on GitHub at the AzureAD/azure-activedirectory-identitymodel-extensions-for-dotnet repository.
The main class is the JwtSecurityTokenHandler, but the ones were after is ClaimTypeMapping. Because it’s quite a big portion of code, here’s the link to the relevant part: https://github.com/AzureAD/azure-activedirectory-identitymodel-extensions-for-dotnet/blob/a301921ff5904b2fe084c38e41c969f4b2166bcb/src/System.IdentityModel.Tokens.Jwt/ClaimTypeMapping.cs#L45-L125.
There we have it, a whopping 72 claims being renamed as they’re processed!
How do I opt out of this?
This behaviour could be confusing; imagine you consult the documentation of your identity provider to understand which claims you can expect back in a JWT that it issues, only to find that some of them are missing when you develop your .NET application!
Luckily, there are multiple ways to disable that behaviour.
1. The global, application-level way
The JwtSecurityTokenHandler class takes a static copy of the mapping dcutionary declared by ClaimTypeMapping, as you can see here on GitHub. This static copy is used by default by all instances of JwtSecurityTokenHandler. The trick is to clear this dictionary when the application starts.
In an ASP.NET Core app, that could be done in Program.Main, for example. My preference would be to put it closer to related code, maybe in Startup.ConfigureServices.
public void ConfigureServices(IServiceCollection services)
{
    // This is the line we just added
    JwtSecurityTokenHandler.DefaultInboundClaimTypeMap.Clear();

    services
        .AddAuthentication(options =>
        {
            options.DefaultScheme = "Cookies";
            options.DefaultChallengeScheme = "OpenIDConnect";
        })
        .AddOpenIdConnect("OpenIDConnect", options =>
        {
            options.Authority = "<the-url-to-the-identity-provider>";
            options.ClientId = "<the-client-id>";
        })
        .AddCookie("Cookies");
}
2. The per-handler way
While opting out at the application level is unlikely to be an issue if you develop a new application, t could have unintended consequences if we were to use it in an existing codebase. The good news is that JwtSecurityTokenHandler exposes instance-level properties which allow us to achieve the same result.
The first option is to clear the instance-level claims mappings dictionary of the handler:
public void ConfigureServices(IServiceCollection services)
{
    services
        .AddAuthentication(options =>
        {
            options.DefaultScheme = "Cookies";
            options.DefaultChallengeScheme = "OpenIDConnect";
        })
        .AddOpenIdConnect("OpenIDConnect", options =>
        {
            options.Authority = "<the-url-to-the-identity-provider>";
            options.ClientId = "<the-client-id>";

            // First option
            // Clear the instance-level dictionary containing the claims mappings
            var jwtHandler = new JwtSecurityTokenHandler();
            jwtHandler.InboundClaimTypeMap.Clear();

            options.SecurityTokenValidator = jwtHandler;
        })
        .AddCookie("Cookies");
}
The second one is to instruct the handler not to perform claims mappings, regardless of whether the dictionary contains mapping or not:
public void ConfigureServices(IServiceCollection services)
{
    services
        .AddAuthentication(options =>
        {
            options.DefaultScheme = "Cookies";
            options.DefaultChallengeScheme = "OpenIDConnect";
        })
        .AddOpenIdConnect("OpenIDConnect", options =>
        {
            options.Authority = "<the-url-to-the-identity-provider>";
            options.ClientId = "<the-client-id>";

            // Second options
            // Instruct the handler not to perform claims mapping
            var jwtHandler = new JwtSecurityTokenHandler
            {
                MapInboundClaims = false
            };

            options.SecurityTokenValidator = jwtHandler;
        })
        .AddCookie("Cookies");
}
Conclusion
In this post we went through the default behaviour in which JWT claims are being mapped to different names in .NET applications. By going through the source code of the library that handles JSON Web Tokens, we also pinned down how the library implements the mapping, as well as several ways to disable it.
What library did you wish you knew the internals of better? There’s a high chance it’s open source on GitHub these days, and if it isn’t, you can always use a .NET decompiler to read the code.
